introduction:
1.
i hope you understand me my english is not the best, the furnituremaker tool is realy hard to learn but if you master it it is realy easyfor the first you must be know furnitures are a bunch of ArmorStands then the furniture have to mutch ArmorStands you can have CLIENT lags. To start with your own furniture model you must be build a flat square of 19x19 blocks this is the working area, it is not required but it make the thing easier, you can place a chest with nametags and a anvil at your working area. All furnitures from my plugin deos place on the rightclicked block and away from the player and in the right side this is the best result
1.1 Build a working area

The working area is a square of 19x19 blocks, the redpoint is the start block, later you stand on the block and run the create command "/furniture create NAME" you can build a chest with Nametags and a anvil into the working area. The white area is the area who you must be place your armorstands for the best result.

The nametags are needet for the spacial functions of armorstands for that look into the extra stuff section
the basics:
1.
if you are finish with the building of a working area you can run the command "/furniture create NAME" in the middel of the working area in my working area i placed on this position a red wool block. you can clon an existend furniture to rework it with the command "/furniture create NAME Source"
The FurnitureMaker generate a world border for you around your working area, you are the only people who can see it.

The red wool block is the start position and the green wool block is the direction away from the player and the green wool block is the direction right from the player


2. The toolbar basic (1/3)
 The ArmorStand is the armorstand spawn tool then you rightclick it its spawn a armorstand
on the start position.
 The barrier item deos cancle the furniture creation.
2.1 The toolbar basic (2/3)
 The ArmorStand is the armorstand spawn tool then you rightclick it its spawn a armorstand
on the start position.

leftclick: move size up
rightclick: move size down
crouch+leftclick: move size up
crouch+rightclick: move size down
crouch+scroll-left: move away
crouch+scroll-right: move back
 The feather is your armorstand editor tool you can change some metadatas from your selected armorstand

leftclick: move size up
rightclick: move size down
crouch+leftclick: move size up
crouch+rightclick: move size down
crouch+scroll-left: rotate left
crouch+scroll-right: rotate right
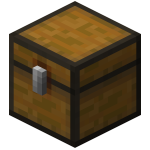
 The chest is the item to edit your selected armorstand.

leftclick: change betweeen [x,y,z] up
rightclick: change between [x,y,z] down
crouch+leftclick: change the bodypart will be moved [head, body, left_arm, right_arm, left_leg, right_leg] up
crouch+rightclick: change the bodypart will be moved [head, body, left_arm, right_arm, left_leg, right_leg] down
crouch+scroll-left: rotate away
crouch+scroll-right: rotate to you
 The end crystal item is the item to clone your selected armorstands.
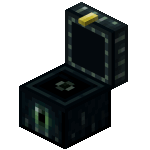
 The enderchest is to select armorstands.
 The stick item is for go back to the last side
2.2 The toolbar basic (3/3)
 The stick item is for go back to the last side
 The barrier item deos cancle the furniture creation.
 Rotate all armorstand around the start position.
 Change the block position state.
 Finish your furniture :)
extra stuff:
1.Basic Tags
this is all avaible name tags you can give armorstands:- #SITZ# | this is the name tag to enable the sit functions
- #ITEM# | the armorstand will be display the item in the right arm slot
- #BLOCK# | the armorstand will be display the item on the head
1.Dye Engine
the dye engine is a powerful engine to add color to the furniture this is very complex a dye tag look like this:
#DYE_MATERIAL:CONSUME_MATERIAL##DYE_MATERIAL:MATERIAL#
#DYE_MATERIAL:CONSUME_DYE#
#DYE_MATERIAL:DYE#
you can chose a MATERIAL from this list: Link
the first MATERIAL is the Item who have the armorstand on the helm slot for exemple: banner or wool ....
the secound MATERIAL is the Item who you want to replace to the helm slot for exemple: the banner on the helm slot can be change to a stone or a banner to recolor it
if you add the CONSUME_ tag before the Material the player will be remove one of the Stack at the Main hand
if you want to change only the color you must be set the secound Material to dye